How to set up a big Skype for Business presentation
In a break from the norm, I’m returning to writing step-by-step technical workshops for the first time in 10 years.
In a break from the norm, I’m returning to writing step-by-step technical workshops for the first time in 10 years.
A recent glut of conference calls and all-remote stand-ups and company gatherings has reminded me that the options that can help you set up a big Skype for Business presentation are slightly hidden.
Skype for Business contains some very useful features for holding large meetings and presentations (I’m going to use the two terms interchangeably, and I’m referring to the type of meeting in which a small number of people are expected to do most of the talking or presenting, and most other callers will be listening and watching). But those features are not very well signposted.
I’m using the most recent Outlook version from Office 365, on a Windows 10 PC. Some of this might look a bit different for other configurations, but the principles are the same.
Set up your meeting as you normally would, and invite people. There are several ways to do this, and here I’m doing it from the New Items item on the Outlook ribbon.
2. Click the Skype Meeting button to add a Skype presence to the invitation. So far, so normal.
You’ll see the meeting details in the message body.
3. Now click on the Meeting Options button that has appeared next to the Skype button (which itself has changed from “add Skype” to “join Skype”).
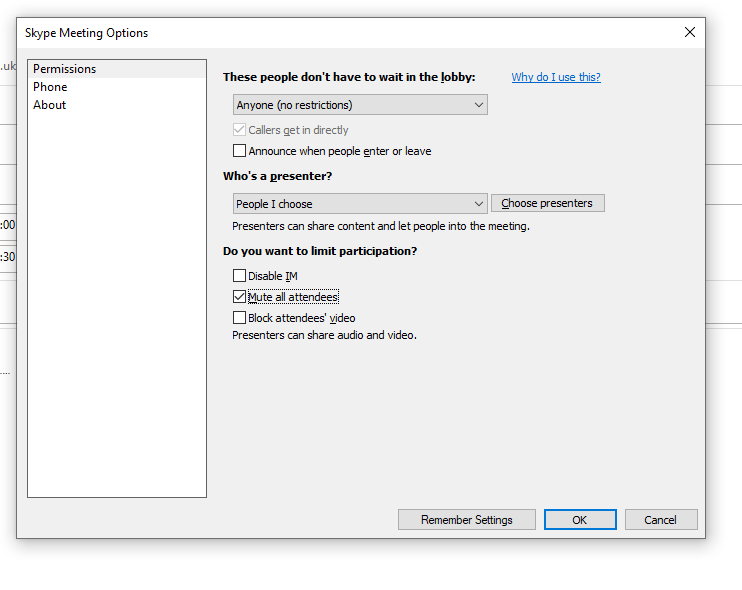
4. In the window that appears, you’ll see several sets of options. First are the lobby options which are not particularly relevant to us.
Here’s what Microsoft’s Office website has to say about what you might like to set the lobby options to. I tend not to have meetings with people outside the organisation these days, and even if I do, they tend not to be confidential, so I just have it set to “Anyone (no restrictions)”, but use the one that suits you. Don’t forget to keep an eye on the lobby and let people in when they arrive there.
I also tend to leave the “Announce when people enter or leave” box unticked because that feature is annoying.
5. Back to that window. In the “Who’s a presenter?” section, we’re going to change the drop-down option from the default (anyone from your organisation is a “presenter”) to “People I choose”.
This is the important bit — we’re going to use Skype and Outlook’s built-in delineation between presenters and audience to make it easier to run our meeting.
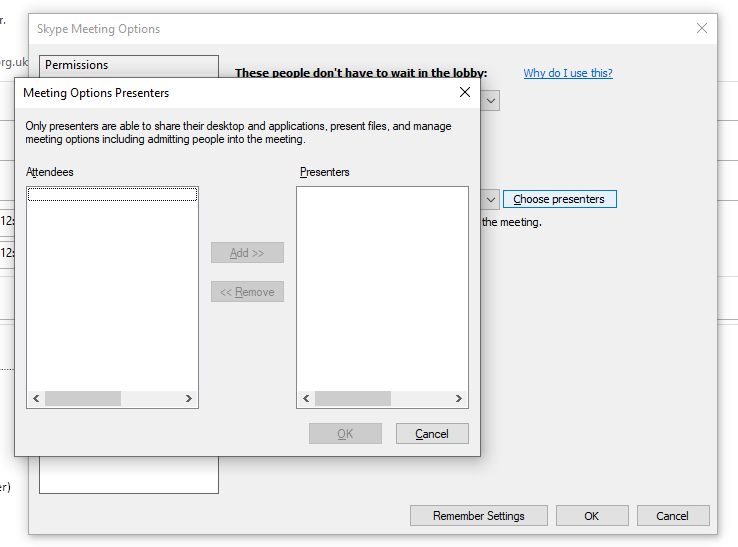
6. Now click on “Choose presenters”. In the window that appears now, you’ll see a list of people. In the screenshot below there isn’t anybody because I haven’t invited anyone to this pretend meeting.
Use the Add and Remove arrow buttons to move people between the two columns until everyone who’s presenting is in the right-hand Presenter column and everyone else is in the left-hand Attendees column. Press OK when you’ve finished.
7. Now we’re going to make sure everyone’s muted when they join the call. In the previous window (which you should be back in once you pressed OK in step 6) tick the box marked “Mute all attendees”.
8. We’re not going to disable IM, which is the ability to use text chat in the call. This tends to be quite useful when people are muted. But you can block attendees’ video, which means that by default their webcams will be disabled, regardless of their own settings. This reduces distractions and can be helpful if the connection is poor, because it reduces the amount of data being transferred to everyone in the call.
9. That’s it. If you wish, back in the invitation window, you can also untick the Request Responses menu item, which will mean you won’t be notified when people accept or reject your invitation.
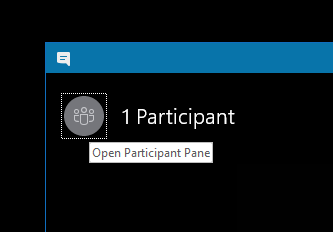
10. Now the time is upon us and we’re in the call itself, where there are a couple more options. Click on the people icon at the top-left of the call window to display the list of participants.
11. Click Participant Actions at the bottom of the pane, and you’ll see a Participant Actions window.
12. From here, you can toggle the IM and attendee video, as well as muting the audience quickly. The important distinction here is that if you use this button without first setting out who the presenters are (above) then clicking this will mute everyone on the call. Which you don’t want.


